While some skylight manufacturers include flashing in their products sometimes roofing professionals have to create it or purchase it separately.
How to put z flashing in attic liner.
Cut 1 inch deep slits into the top edge of the flashing placing one slit every 2 inches along the flashing.
The z flashing resembles the letter z from the side and comes in strips about 10 feet long.
Although commonly called z flashing the z has squared corners and it could as easily have been named stair step flashing we see it most often used at the horizontal joint between two sheets of plywood exterior siding to provide protection from water seeping in at the opening.
Many roofers cut the shingles across because they say it s safer.
It may be quite a labor but it pays off with a strong roof.
Attic flooring intended for a living space must be installed in compliance with building codes.
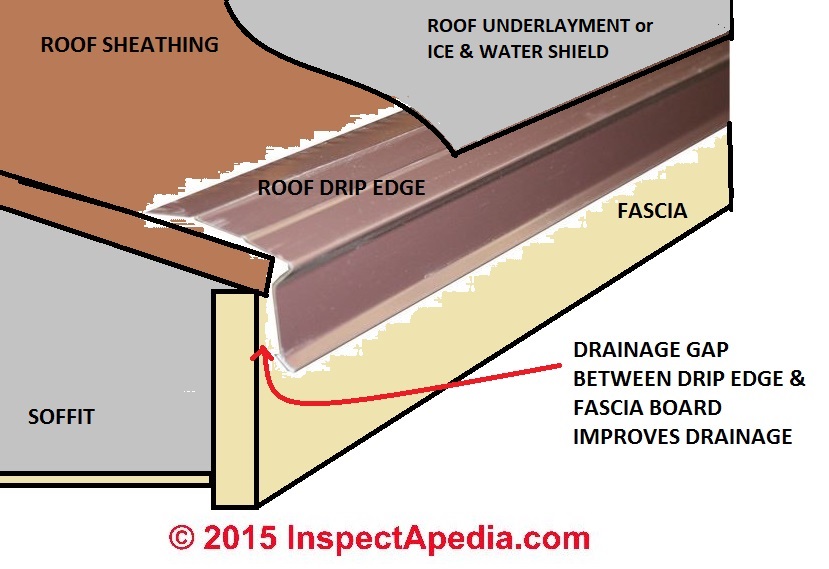
The edge of the roof has thin metal flashing that helps water drip off the roof without damaging the home or causing a leak.
In addition to the common remodel that turns an attic into a master suite or a guest room here are some more interesting ways to use your attic space.
Fasten panels by screwing through the flat next to each rib at every ceiling joist.
Always start at a corner with the overlap side toward the wall.
Install the j trim or large j trim with frieze around the.
Learn how to finish an attic s walls and ceiling with these easy step by step directions.
Some communities will allow homeowners to do their own construction but they are still subject to.
Cut a piece of flashing to measure the circumference of the flue plus 6 inches.
Slide the widest edge of a z flashing strip behind the upper siding panel.
In a tight attic space finishing the walls and ceiling is especially important.
Open valleys have metal flashing to protect this critical area of the roof.
Cost skill level start to finish 2 days.
Ceiling liner overlap the first panels end by 6.
Nail gun level.
First panel will slide into the j trim and will run perpendicular to the ceiling joists.
In this video i show you how i do the valleys on a shingle roof.
When the upper part of the.