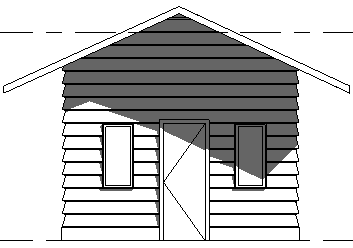
How To Split Siding In Revit

Siding Facade In Revit Tutorial Youtube

Siding Facade In Revit Tutorial Youtube

Revit Wood Cedar Siding Wall Youtube

Revit Wood Cedar Siding Wall Youtube

How To Model Board And Batten Siding In Revit Youtube

How To Model Board And Batten Siding In Revit Youtube

Solved Sheathing And Siding Overlapping Issue Autodesk Community Revit Products

Solved Sheathing And Siding Overlapping Issue Autodesk Community Revit Products

Wood Metal Framing Enhancements Bridging Openings Siding And More Agacad

Wood Metal Framing Enhancements Bridging Openings Siding And More Agacad

Creating Vinyl Siding Wall Cadnotes

Creating Vinyl Siding Wall Cadnotes

Creating Vinyl Siding Wall Cadnotes

What is the process to get materials such as board batten or channel siding to go vertical instead of horizontal.

How to split siding in revit.

Siding soldier brick course window header sill etc. I can get a reveal on the walls that are. When editing the structure of a vertically compound wall use the split region tool to divide a wall layer or region horizontally or vertically into new regions. How do i do that in revit.

Click the split region button under modify vertical structure and move your mouse pointer along the inside face of the brick layer to a point 4 0 1 200 mm above the bottom of the sample as shown. Split face paint method is bad because it can get destroyed when edits are made. November 17th 2011 04 15 pm 4. Are the items actually build installed not painted.

When you split a region the new regions assume the same material as the original. See access tools for vertically compound walls. I am a newbie revit user for the 2011 not the 2012 as i can not downgrade. Welcome to the revit forum.

To access the split regions tool open the edit assembly dialog for the wall type. Select the wall sweep you just made and edit the type properties. Hardiplank but have the top 1 or so on slanted and straight profiles to have a reveal and be metal instead of the siding. Topics covered or edit profile creatin.

Revit precast panels using reveals. My problem i am having is that i have an exterior structural wall and on the entire surface of that exterior wall i want to put 4 wood cedar siding horzontal direction repeatedly to the top of the roof. Welcome to autodesk s revit architecture forums. Next choose horizontal or vertical placement then click on the wall in the location where you want the joint.

To model precast panels using reveals we need to be in a section or elevation view on the structure tab click the drop down on the wall button and select wall reveal. In this video we explore a couple of ways to add more detail to a wall type by using board and batten as an example. Select row 2 in the layers list and then click the insert button to add another row immediately below the first exterior layer. To split a layer.

Revit Demo How To Model Exterior Cladding Youtube

Revit Demo How To Model Exterior Cladding Youtube

Solved Exterior Panel Using Pattern With Offset Autodesk Community Revit Products

Solved Exterior Panel Using Pattern With Offset Autodesk Community Revit Products

Purcell Timber Frames The Precrafted Home Company House Plans Barn House Plans Timber Framing

Purcell Timber Frames The Precrafted Home Company House Plans Barn House Plans Timber Framing

Summer S Coming Why Fiber Cement Siding Will Keep Your Home Cool Fibre Cement Cladding Cement Siding Fiber Cement

Summer S Coming Why Fiber Cement Siding Will Keep Your Home Cool Fibre Cement Cladding Cement Siding Fiber Cement

Source : pinterest.com